[ad_1]
In this tutorial, you will learn to install TensorFlow 2.0 on your macOS system running either Catalina or Mojave
There are a number of important updates in TensorFlow 2.0, including eager execution, automatic differentiation, and better multi-GPU/distributed training support, but the most important update is that Keras is now the official high-level deep learning API for TensorFlow.
Furthermore, if you own a copy of my book, Deep Learning for Computer Vision with Python, you should use this guide to properly install TensorFlow 2.0 on your macOS system.
Inside this tutorial, you’ll learn how to install TensorFlow 2.0 on macOS (using either Catalina or Mojave).
Alternatively, click here for my Ubuntu + TensorFlow 2.0 installation instructions.
To learn how to install TensorFlow 2.0 on macOS, just keep reading.
How to install TensorFlow 2.0 on macOS
In the first part of this tutorial, we’ll briefly discuss the pre-configured deep learning development environments that are a part of my book, Deep Learning for Computer Vision with Python.
We’ll then configure and install TensorFlow 2.0 on our macOS system.
Let’s begin.
Pre-configured deep learning environments
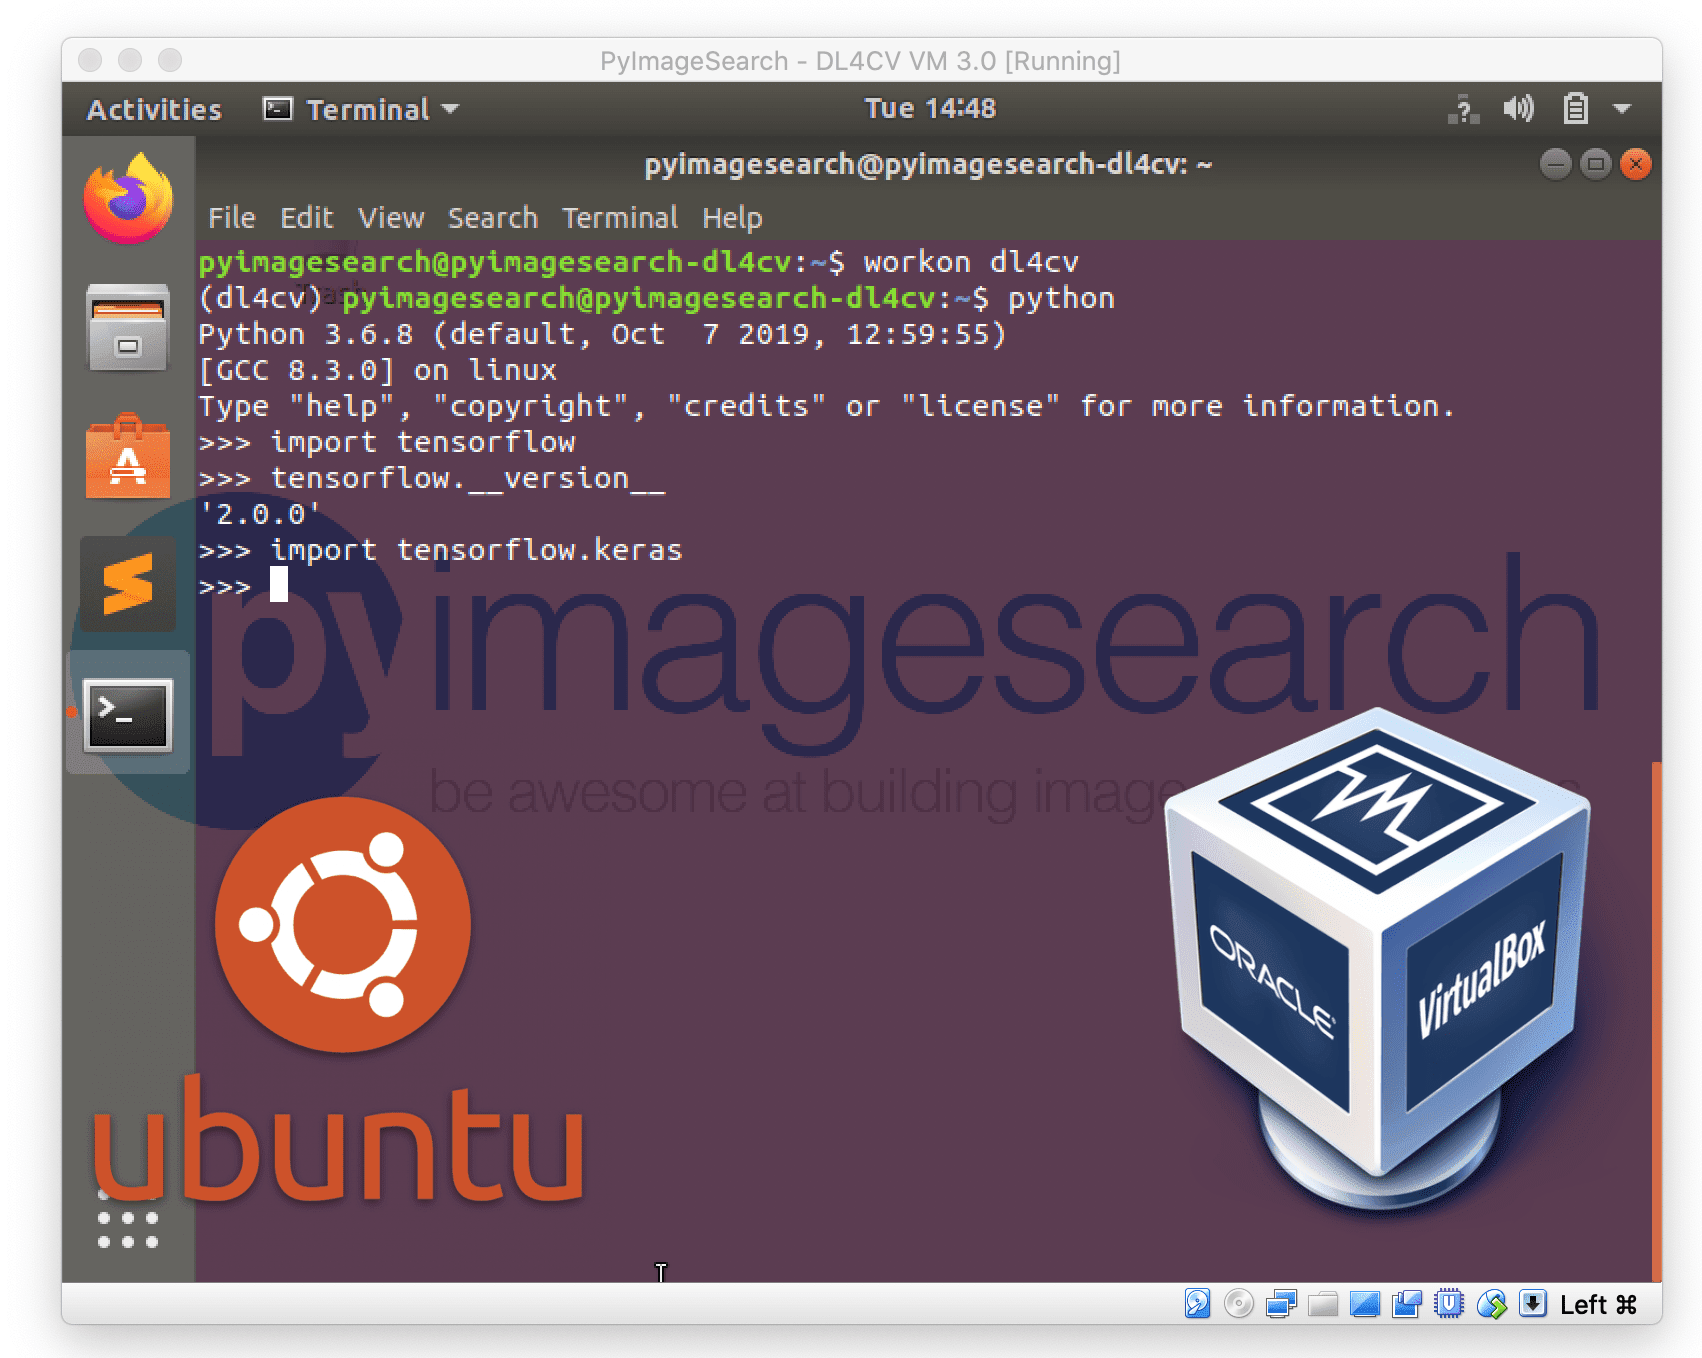
Figure 1: My deep learning Virtual Machine with TensorFlow, Keras, OpenCV, and all other Deep Learning and Computer Vision libraries you need, pre-configured and pre-installed.
When it comes to working with deep learning and Python I highly recommend that you use a Unix-based environment.
Deep learning tools can be more easily configured and installed on Unix systems, allowing you to develop and run neural networks quickly.
Of course, configuring your own deep learning + Python + Linux development environment can be quite the tedious task, especially if you are new to Unix, a beginner at working the command line/terminal, or a novice when compiling and installing packages by hand.
In order to help you jump start your deep learning + Python education, I have created two pre-configured environments:
- Pre-configured VirtualBox Ubuntu Virtual Machine (VM) with all necessary deep learning libraries you need to be successful (including Keras, TensorFlow, scikit-learn, scikit-image, OpenCV, and others) pre-configured and pre-installed.
- Pre-configured Deep Learning Amazon Machine Image (AMI) which runs on Amazon Web Service’s (AWS) Elastic Compute (EC2) infrastructure. This environment is free for anyone on the internet to use regardless of whether you are a DL4CV customer of mine or not (cloud/GPU fees apply). Deep learning libraries are pre-installed including both those listed in #1 in addition to TFOD API, Mask R-CNN, RetinaNet, and mxnet.
I strongly urge you to consider using my pre-configured environments if you are working through my books. Using a pre-configured environment is not cheating — they simply allow you to focus on learning rather than the job of a system administrator.
If you are more familiar with Microsoft Azure’s infrastructure, be sure to check out their Ubuntu Data Science Virtual Machine (DSVM), including my review of the environment. The Azure team maintains a great environment for you and I cannot speak highly enough about the support they provided while I ensured that all of my deep learning chapters ran successfully on their system.
That said, pre-configured environments are not for everyone.
In the remainder of this tutorial, we will serve as the “deep learning systems administrators” installing TensorFlow 2.0 on our bare metal macOS machine.
Configuring your macOS TensorFlow 2.0 deep learning system
The following instructions for installing TensorFlow 2.0 on your machine assume either:
- You have administrative access to your system
- You can open a terminal and or you have an active SSH connection to the target machine
- You know how to operate the command line.
Let’s get started!
Step #1: Choose your macOS deep learning platform — either Catalina or Mojave
Figure 3: This tutorial supports installing TensorFlow 2.0 on macOS Mojave or macOS Catalina.
These TensorFlow 2.0 install instructions in this guide are compatible with the following operating systems:
- macOS: 10.15 “Catalina”
- macOS: 10.14 “Mojave”
Alternatively, you may follow my Ubuntu + TensorFlow 2.0 installation instructions.
Note: You may be wondering “What about Windows?” Keep in mind I do not support Windows on the PyImageSearch blog. You can read more about my “no Windows policy” in my FAQ.
Step #2 (Catalina only): Choose Bash or ZSH as your shell
This step is for macOS Catalina only. If you use Mojave, please ignore this step and skip to Step #3.
On macOS Catalina, you have the option of using a Bash shell or ZSH shell.
Bash is probably what you’re used to. Previous versions of macOS have used Bash and by default, Ubuntu uses Bash as well. Apple has now made a decision that going forward, their operating systems will use ZSH.
So what’s the big deal and should I switch?
Describing the differences between Bash and ZSH is outside the scope of this post — it’s entirely up to you to decide. I would recommend reading this ZSH vs. Bash tutorial to get you started, but again, the choice is up to you.
On one hand, you may discover that the changes do not impact you much and that using ZSH will be very comparable to Bash. Power users, on the other hand, may notice additional features.
If you upgraded from High Sierra or Mojave to Catalina, by default your system will likely use Bash unless you explicitly change it by going into your terminal profile settings.
If your computer came with Catalina installed or you installed Catalina from scratch, then your system will likely use ZSH by default.
Either way, if you decide to need make the switch on Catalina, you can follow these instructions to set your profile to use ZSH.
Changing your shell is relatively simple via your “Terminal Preferences” > “Profiles” > “Shell” menu as shown in Figure 4:
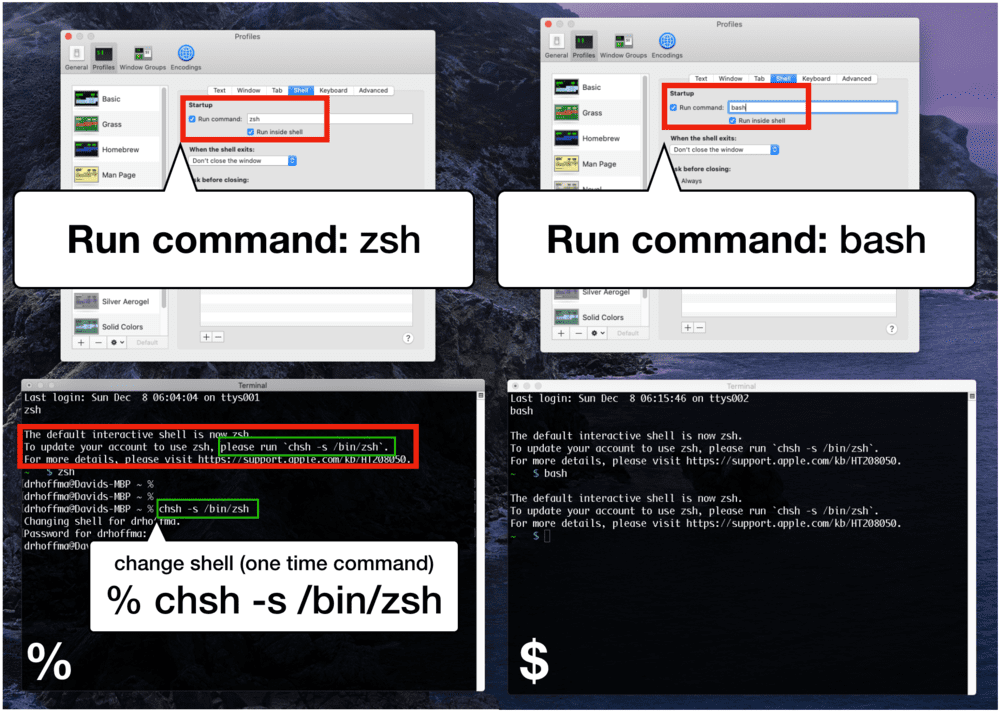
Figure 4: Changing your macOS Catalina shell to ZSH (left), a step you may wish to do before installing TensorFlow 2.0 on macOS (click for high-res).
The shell you use determines which terminal profile you edit later in this install guide:
- ZSH:
~/.zshrc - Bash:
~/.bash_profile
ZSH will accommodate
~/.bash_profile if you source it from within
~/.zshrc . Just keep in mind that not all settings will work. For example, in my
~/.bash_profile , I had a custom bash prompt which showed only the current lowest level working directory (shorter) and also which branch of a Git repository I’m working on (useful for software development). The problem is that ZSH didn’t like my custom Bash prompt, so I had to remove it. I’ll have to set up a custom ZSH prompt in the future.
Realistically, it is probably better if you copy the settings from your Bash Profile that you need into your ZSH profile and ensure that they work. Alternatively, you can source your Bash Profile within your ZSH Profile (i.e. insert
source ~/.bash_profile as a line into your
~/.zshrc file — then open a fresh shell or reload it with the
source ~/.zshrc command).
If you were previously working in Bash (i.e. you upgraded to Catalina), you may encounter the following message in your terminal:
|
|
The default interactive shell is now zsh. To update your account to use zsh, please run chsh -s /bin/zsh For more details, please visit https://support.apple.com/kb/HT208050. |
This means that to switch shells, you should enter the command at the prompt:
Note that the ZSH prompt is
% . The remainder of this tutorial will show
$ at the beginning of the prompt, but you can think of it as
% if you are using ZSH.
Step #3: Install macOS deep learning dependencies
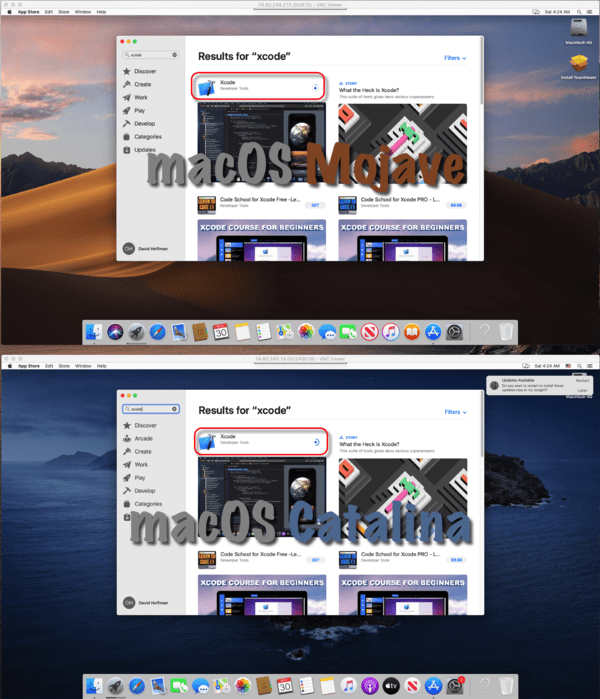
Figure 5: Prior to installing TensorFlow 2.0 on macOS Mojave or macOS Catalina, you must install Xcode from the App Store.
In either version of macOS, go ahead and open your macOS App Store and find and download/install Xcode (Figure 5).
From there, accept the Xcode license in the terminal:
|
|
$ sudo xcodebuild –license |
Press the
space key as you read the agreement. Then type
agree at the prompt.
And then install Xcode select:
|
|
$ sudo xcode–select —install |
Note: If you encounter this error message
xcode–select: error: tool ‘xcodebuild’ requires Xcode, but active developer directory ‘/Library/Developer/CommandLineTools’ is a command line tools instance you may need to follow these SOF instructions.
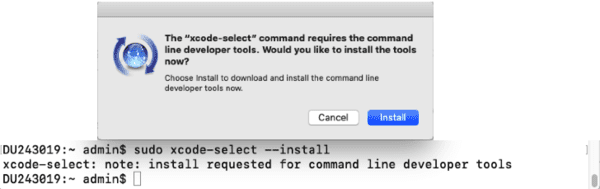
Figure 6: To install TensorFlow 2.0 on macOS Mojave/Catalina, be sure to install the Xcode-select tools.
The unofficial, community-driven package manager for macOS is called Homebrew (brew for short). Many packages that you could install with Aptitude (apt) on Ubuntu are available via HomeBrew on macOS.
We’ll use Homebrew to install a handful of dependencies. It does not come pre-installed on macOS, so let’s install it now (only do this if you don’t already have Homebrew):
|
|
$ /usr/bin/ruby –e “$(curl -fsSL https://raw.githubusercontent.com/Homebrew/install/master/install)” |
From there, update Homebrew:
Now go ahead and edit your ZSH Profile or Bash Profile. Be sure that you update the correct file depending on whether you use ZSH or Bash on macOS:
-
~/.zshrc (ZSH) -
~/.bash_profile (Bash)
|
|
$ nano ~/.zshrc # ZSH $ nano ~/.bash_profile # Bash |
Again, you should only be editing one of the above files based on which shell your macOS system is using.
From there, insert the following lines at the end of your profile:
|
|
# Homebrew export PATH=/usr/local/bin:$PATH |
Save the file (
ctrl + x ,
y ,
enter ) and exit to your terminal.
Now go ahead and source the profile (i.e. reload it):
|
|
$ source ~/.zshrc # ZSH $ source ~/.bash_profile # Bash |
Once again, only one of the above commands should be executed depending on which macOS shell you are using.
We’re now ready to install Python 3:
Let’s check that our Python 3 is properly linked at this point:
|
|
$ which python3 /usr/local/bin/python3 |
You should verify that the output path begins with
/usr/local. If it does not, then double-check that Homebrew’s Python is installed. We do not want to use the system Python as our virtual environments will be based on Homebrew’s Python.
At this point, Homebrew and Python are ready for us to install dependencies:
|
|
$ brew install cmake pkg–config wget $ brew install jpeg libpng libtiff openexr $ brew install eigen tbb hdf5 |
Our dependencies include compiler tools, image I/O, optimization tools, and HDF5 for working with large datasets/serialized files.
Great job installing dependencies on macOS — you can now proceed to Step #4.
Step #4: Install pip and virtual environments
In this step, we will set up pip and Python virtual environments.
We will use the de-facto Python package manager, pip.
Note: While you are welcome to opt for Anaconda (or alternatives), I’ve still found pip to be more ubiquitous in the community. Feel free to use Anaconda if you so wish, just understand that I cannot provide support for it.
Let’s download and install pip:
|
|
$ wget https://bootstrap.pypa.io/get–pip.py $ sudo python3 get–pip.py |
To complement pip, I recommend using both virtualenv and virtualenvwrapper to manage virtual environments.
Virtual environments are a best practice when it comes to Python development. They allow you to test different versions of Python libraries in sequestered development and production environments. I use them daily and you should too for all Python development.
In other words, do not install TensorFlow 2.0 and associated Python packages directly to your system environment. It will only cause problems later.
Let’s install my preferred virtual environment tools now:
|
|
$ pip3 install virtualenv virtualenvwrapper |
Note: Your system may require that you use the
sudo command to install the above virtual environment tools. This will only be required once — from here forward, do not use
sudo .
From here, we need to update our bash profile:
|
|
$ nano ~/.zshrc # ZSH $ nano ~/.bash_profile # Bash |
Only edit one of the files above based on which shell your macOS system uses.
Next, enter the following lines at the bottom of the file:
|
|
# virtualenv and virtualenvwrapper export WORKON_HOME=$HOME/.virtualenvs export VIRTUALENVWRAPPER_PYTHON=/usr/local/bin/python3 source /usr/local/bin/virtualenvwrapper.sh |
Save the file (
ctrl + x ,
y ,
enter ) and exit to your terminal.
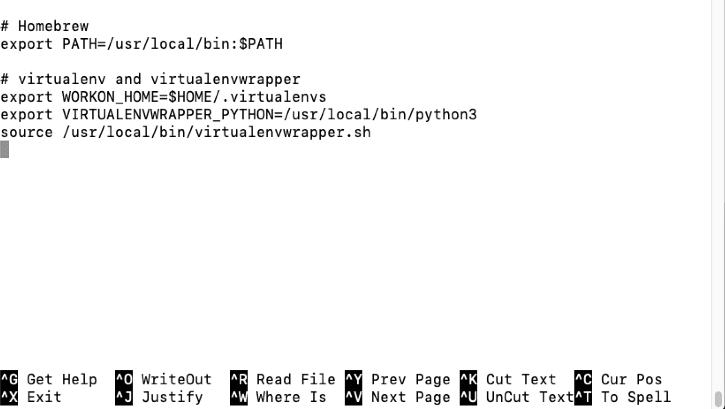
Figure 7: How to install TensorFlow 2.0 on macOS. This figure shows the Bash or ZSH profile in macOS configured with Homebrew and virtualenvwrapper.
Don’t forget to source the changes in your profile:
|
|
$ source ~/.zshrc # ZSH $ source ~/.bash_profile # Bash |
You only need to execute one of the commands above — just verify which shell you are using first (either ZSH or Bash).
Output will be displayed in your terminal indicating that
virtualenvwrapper is installed.
Note: If you encounter errors here, you need to address them before moving on. Usually, errors at this point are due to typos in your
~/.bashrc file.
Now we’re ready to create your Python 3 deep learning virtual environment named
dl4cv:
|
|
$ mkvirtualenv dl4cv –p python3 |
You can create similar virtual environments with different names (and packages therein) as needed. On my personal system, I have many virtual environments. For developing and testing software for my book, Deep Learning for Computer Vision with Python, I like to name (or precede the name of) the environment with
dl4cv . That said, feel free to use the nomenclature that makes the most sense to you.
Great job setting up virtual environments on your system!
Step #5: Install TensorFlow 2.0 into your dl4cv virtual environment on macOS
In this step, we’ll install TensorFlow 2.0.
A prerequisite of TensorFlow is NumPy for numerical processing. Go ahead and install NumPy and TensorFlow 2.0 using pip:
|
|
$ pip install numpy $ pip install tensorflow |
Great job installing TensorFlow 2.0!
Step #6: Install associated packages into your dl4cv virtual environment
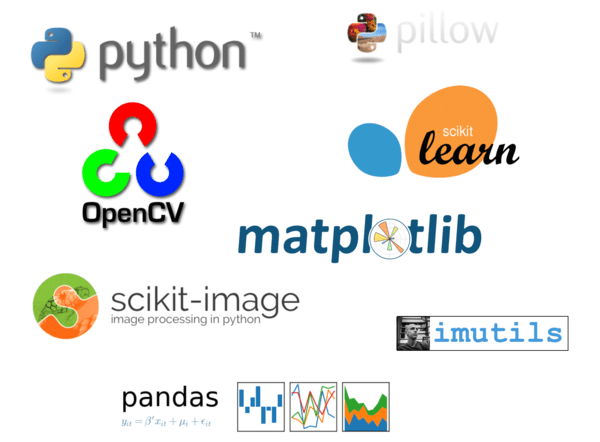
Figure 8: A fully-fledged TensorFlow 2.0 deep learning environment requires a handful of other Python libraries as well.
In this step, we will install additional packages needed for common deep learning development.
We begin with standard image processing libraries including OpenCV:
|
|
$ pip install opencv–contrib–python $ pip install scikit–image $ pip install pillow $ pip install imutils |
These image processing libraries will allow us to perform image I/O, various preprocessing techniques, as well as graphical display.
From there, let’s install machine learning libraries and support libraries including scikit-learn and matplotlib:
|
|
$ pip install scikit–learn $ pip install matplotlib $ pip install progressbar2 $ pip install beautifulsoup4 $ pip install pandas |
Great job installing associated image processing and machine learning libraries.
Step #7: Test your install
In this step, as a quick sanity test, we’ll test our install.
Fire up a Python shell in your
dl4cv environment (or whatever you named your Python virtual environment) and ensure that you can import the following packages:
|
|
$ workon dl4cv $ python >>> import tensorflow as tf >>> tf.__version__ 2.0.0 >>> import tensorflow.keras >>> import cv2 >>> cv2.__version__ 4.1.2 |
Note: If you are on Python 3.7.3 (Catalina) and Clang 11.0 you could encounter this error. This is a known issue with a solution is available here.
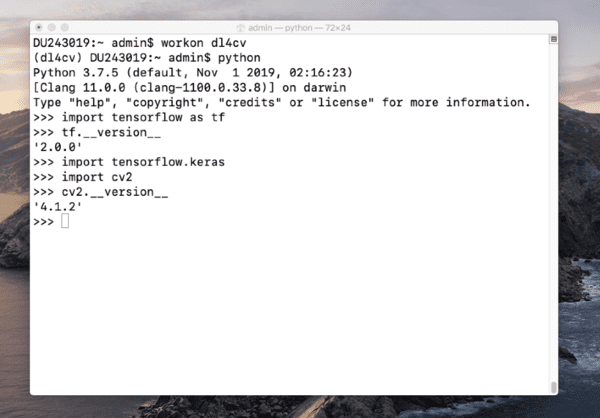
Figure 8: Testing TensorFlow 2.0 installation on macOS inside a Python interpreter.
Accessing your TensorFlow 2.0 virtual environment
At this point, your TensorFlow 2.0
dl4cv environment is ready to go. Whenever you would like to execute TensorFlow 2.0 code (such as from my deep learning book), be sure to use the
workon command to drop into the Python virtual environment where TensorFlow 2.0 is installed:
Your ZSH or Bash prompt will be preceded with
(dl4cv) indicating that you are “inside” the TensorFlow 2.0 virtual environment.
If you need to get back to your system-level environment, you can deactivate the current virtual environment:
Frequently Asked Questions (FAQ)
Q: These instructions seem really complicated. Do you have a pre-configured environment?
A: Yes, the instructions can be daunting. I recommend brushing up on your Unix command line skills prior to following these instructions.
That said, I do offer two pre-configured environments for my book:
- Pre-configured Deep Learning Virtual Machine: My VirtualBox VM is included with your purchase of my deep learning book. Just download the VirtualBox and import the VM into VirtualBox. From there, boot it up and you’ll be running example code in a matter of minutes.
- Amazon Machine Image (EC2 AMI): Free for everyone on the internet. You can use this environment with no strings attached even if you don’t own my deep learning book (AWS charges apply, of course). Again, compute resources on AWS are not free — you will need to pay for cloud/GPU fees but not the AMI itself. Arguably, working on a deep learning rig in the cloud is cheaper and less time-consuming than keeping a deep learning box on-site. Free hardware upgrades, no system admin headaches, no calls to hardware vendors about warranty policies, no power bills, pay only for what you use. This is the best option if you have a few one-off projects and don’t want to invest in hardware.
Q: Why didn’t we install Keras?
A: Keras is officially part of TensorFlow as of TensorFlow v1.10.0. By installing TensorFlow 2.0 the Keras API is inherently installed.
Keras has been deeply embedded into TensorFlow and
tf.keras is the primary high-level API in TensorFlow 2.0. The legacy functions that come with TensorFlow play nicely with
tf.keras now.
In order to understand the difference between Keras and
tf.keras in a more detailed manner, check out my recent blog post.
You may now import Keras using the following statement in your Python programs:
|
|
$ workon dl4cv $ python >>> import tensorflow.keras >>> |
Q: Do these instructions support macOS Mojave and macOS Catalina?
A: Yes, these instructions have been fully tested on Mojave and Catalina. That said, Homebrew changes often and can be the source of problems. If you are having an issue, please contact me or drop a comment below. Please be respectful of this webpage and my email inbox by not dumping large amounts of terminal output. Keep in mind this PyImageSearch policy on debugging development environments as well.
Q: I’m really stuck. Something is not working. Can you help me?
A: I really love helping readers and I would love to help you configure your deep learning development environment.
That said, I receive 100+ emails and blog post comments per day — I simply don’t have the time to get to them all
Customers of mine receive support priority over non-customers due to the number of requests myself and my team receive. Please consider becoming a customer by browsing my library of books and courses.
My personal recommend is that you to grab a copy of Deep Learning for Computer Vision with Python — that book includes access to my pre-configured deep learning development environments that have TensorFlow, Keras, OpenCV, etc. pre-installed. You’ll be up and running in a matter of minutes.
What’s next?
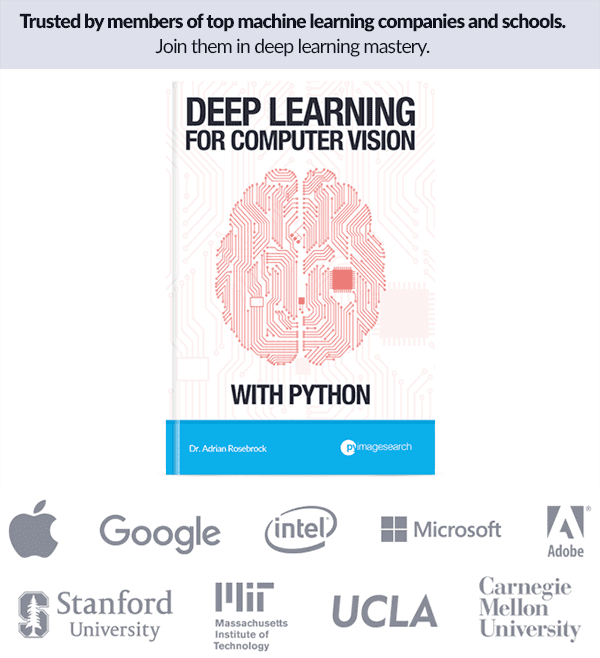
Figure 10: My deep learning book, Deep Learning for Computer Vision with Python, is trusted by employees and students of top institutions. It is regularly updated to keep pace with the fast-moving AI industry. The book is ready to go for TensorFlow 2.0.
The 3rd edition release of Deep Learning for Computer Vision with Python (DL4CV) includes TensorFlow 2.0 support!
DL4CV has taught 1000s of PyImageSearch readers how to successfully apply Computer Vision and Deep Learning to their own projects.
Francois Chollet, Google AI Researcher and creator of the Keras deep learning library had this to say about the book:
This book is a great, in-depth dive into practical deep learning for computer vision. I found it to be an approachable and enjoyable read: explanations are clear and highly detailed. You’ll find many practical tips and recommendations that are rarely included in other books. I highly recommend it, both to practitioners and beginners.
My complete, self-study deep learning book is trusted by members of top machine learning schools, companies, and organizations, including Microsoft, Google, Stanford, MIT, CMU, and more!
And what’s more is that my readers and customers (just like you) have gone on to win Kaggle competitions, secure academic grants, and start careers in CV and DL using the knowledge they gained through study and practice.
Be sure to take a look — and while you’re at it, don’t forget to grab your (free) table of contents + sample chapters.
Summary
In this tutorial, you learned how to installed TensorFlow 2.0 on macOS (either on Catalina or Mojave).
Now that your deep learning rig is configured, I would suggest picking up a copy of Deep Learning for Computer Vision with Python. You’ll be getting a great education and you’ll learn how to successfully apply Deep Learning to your own projects.
To be notified when future tutorials are published here on PyImageSearch, just enter your email address in the form below!
[ad_2]
Source link
Emprendedor en el sector de los videojuegos, tecnologica y educación. + de 20 años en videojuegos. CEO de Hydra Interactive. Fundador de Devsfromspains.

![Buildbox Free - How To Make 2D Platformer Game [PART 1]](https://e928cfdc7rs.exactdn.com/info/uploads/sites/3/2020/01/Buildbox-Free-How-To-Make-2D-Platformer-Game-PART-150x150.jpg?strip=all)

